Road Trip planner
Routes can be displayed between each route pin once you have two or more route pins on the map. Each route shows the route name, distance, travel time, transport type, fuel cost (for driving) and any advisories for the route. The total distance, time and fuel cost are displayed above the list of routes (set fuel values in the Preferences window). Click on the Update Routes button to show route info (it’s also under the View menu). Dashed lines indicate walking. A red line is the selected route from the list of routes. Individual routes can have different colors.
Update Routes
Click the Update Routes button to display the routes. Routes must be visible for certain functions to work correctly. Click the Hide Routes button to remove the routes. If you move a route pin you may have to click the Update Routes button again to update the routes.
Selecting a route from multiple routes
If there are multiple routes available, click on the desired route to show that route.
Round-trip route
If your route is a round-trip route, set the last pin to your starting location. This tends to give you better information on the last route segment of your trip.
Show a route in Apple Maps
To show a route in Apple Maps, select the route and click on the Map button. Apple Maps only accepts one route at a time.
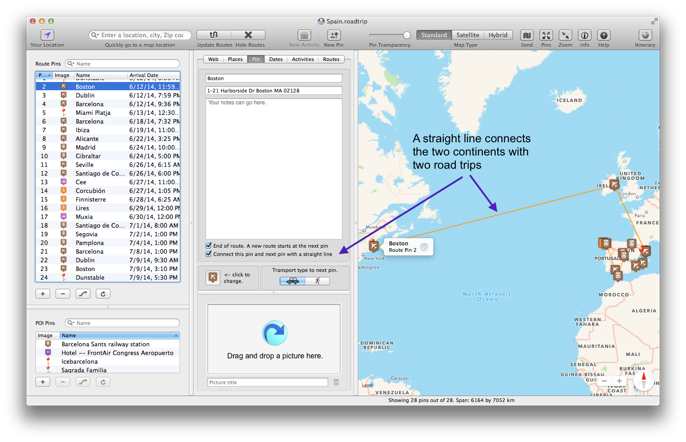
Two or more road trips and one document
If your trip includes multiple continents, you can set the “End of Route” on the last pin of a route, and a new route starts at the next pin. You can also choose to connect the routes with a straight line. See example below.
Route line transparency
You can set the route lines to be semi-transparent in the Preferences.
Error when obtaining route information
If Apple’s Maps server receives too many route requests, the routes are “throttled,” meaning you have to wait awhile or restart Road Trip Planner before the servers will respond again. From our experience if more than 50 routes are displayed within one minute you may see the warning. If you have fewer routes but display them often you may get the same message.
If you have over 50 routes and receive the error, wait at least 60 seconds and then select Update Last Routes form the View menu.
Routes show you where to drive or walk
Copyright © 2015 Modesitt Software. All rights reserved.

Route Elevation Chart
Road Trip Planner cannot show a route elevation chart, but RTP Viewer or RTP for iOS can show an elevation chart on your iPhone or iPad using the file you created on your Mac.
Otherwise you can create one with another tool, either GPX Viewer or GPX Editor. Below is how it’s done.
-
1.Update the routes on your Road Trip Planner file.
-
2.Export the file as a GPX file. Be sure to check the box “Include route data.”
-
3.Open the file with either GPX Viewer or GPX Editor.
-
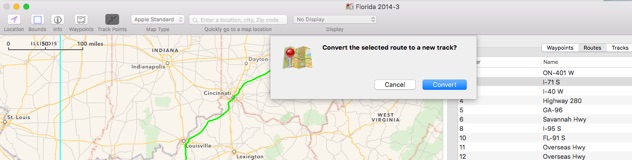
4.Find a route of interest, and convert it to a track (see below).
-
5.Select the track points of interest, and click the elevation button. The elevation button has a small mountain icon, below the track point list. Note: it takes about 1 second to calculate 2 track points. In the example below, only the first 500 track points were selected.
-
6.Select Elevation vs Distance in the toolbar popup menu, and an elevation vs distance chart is created.

